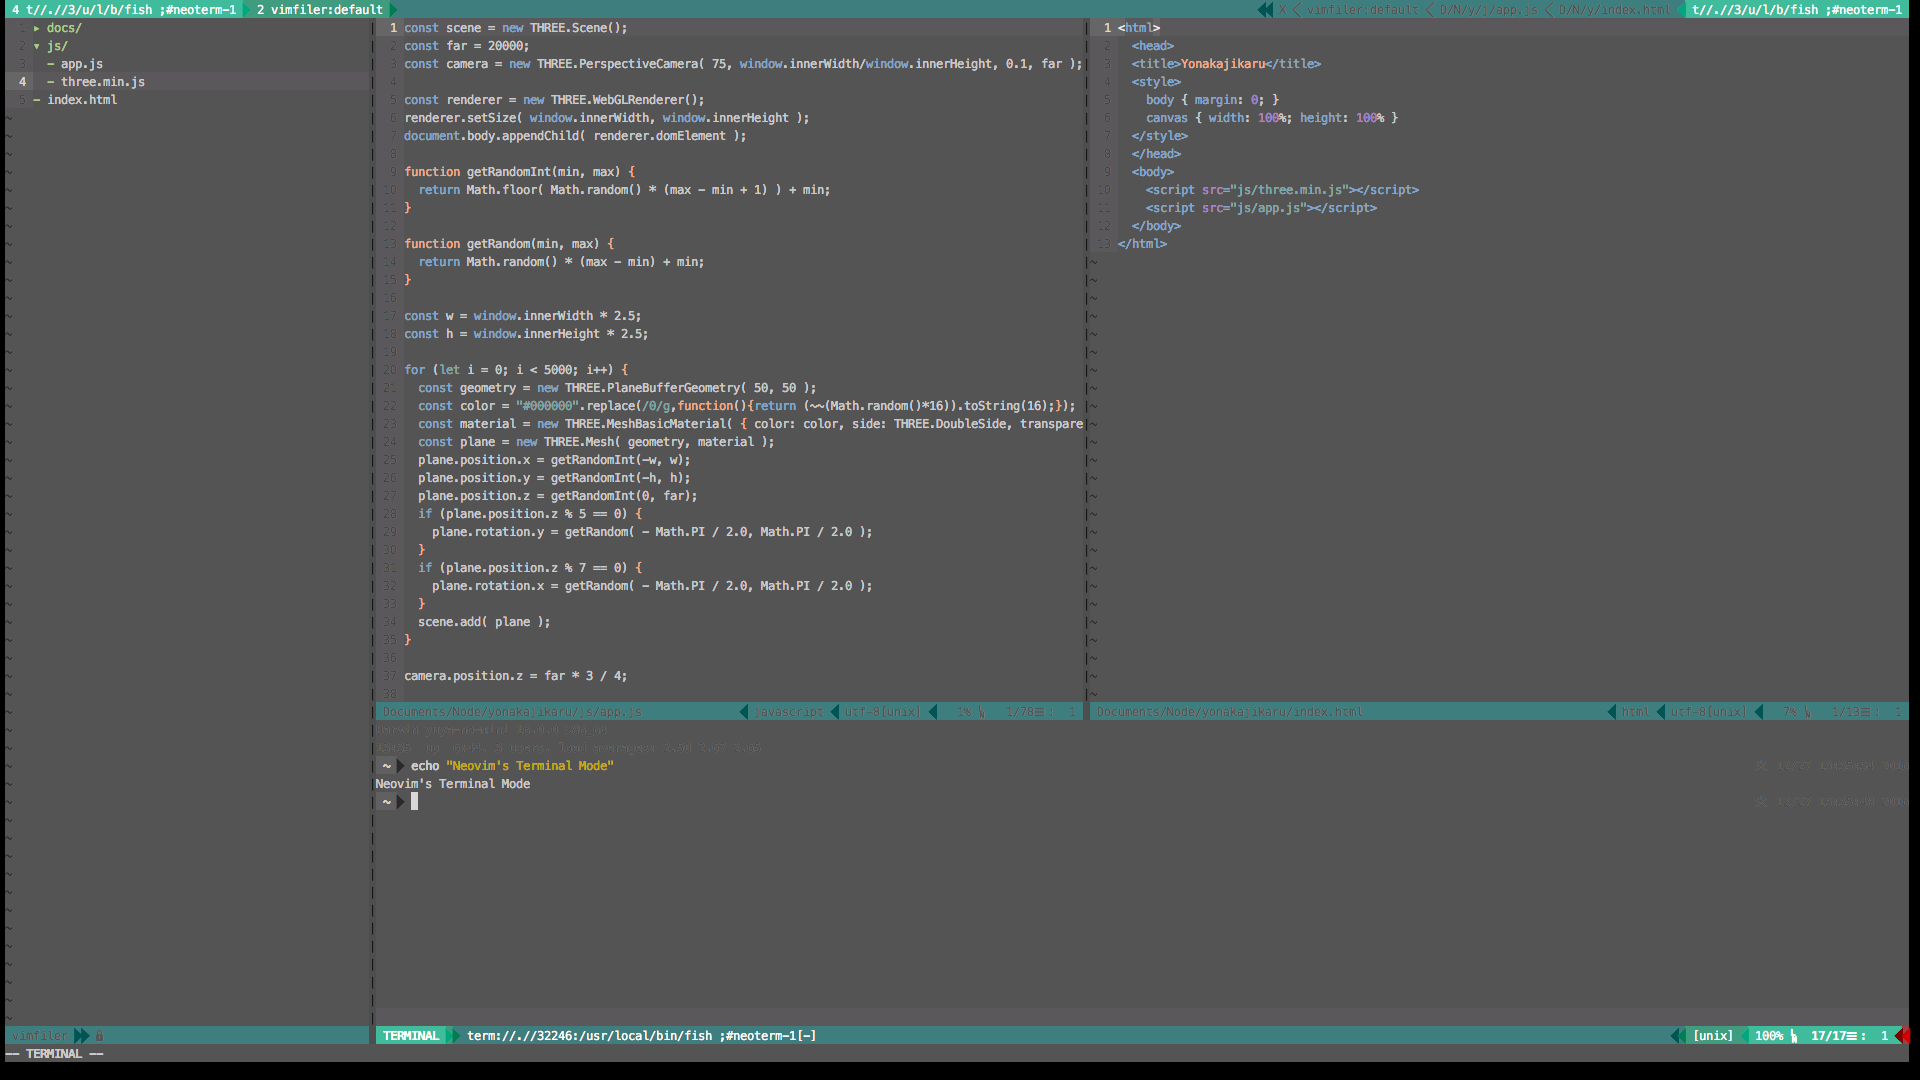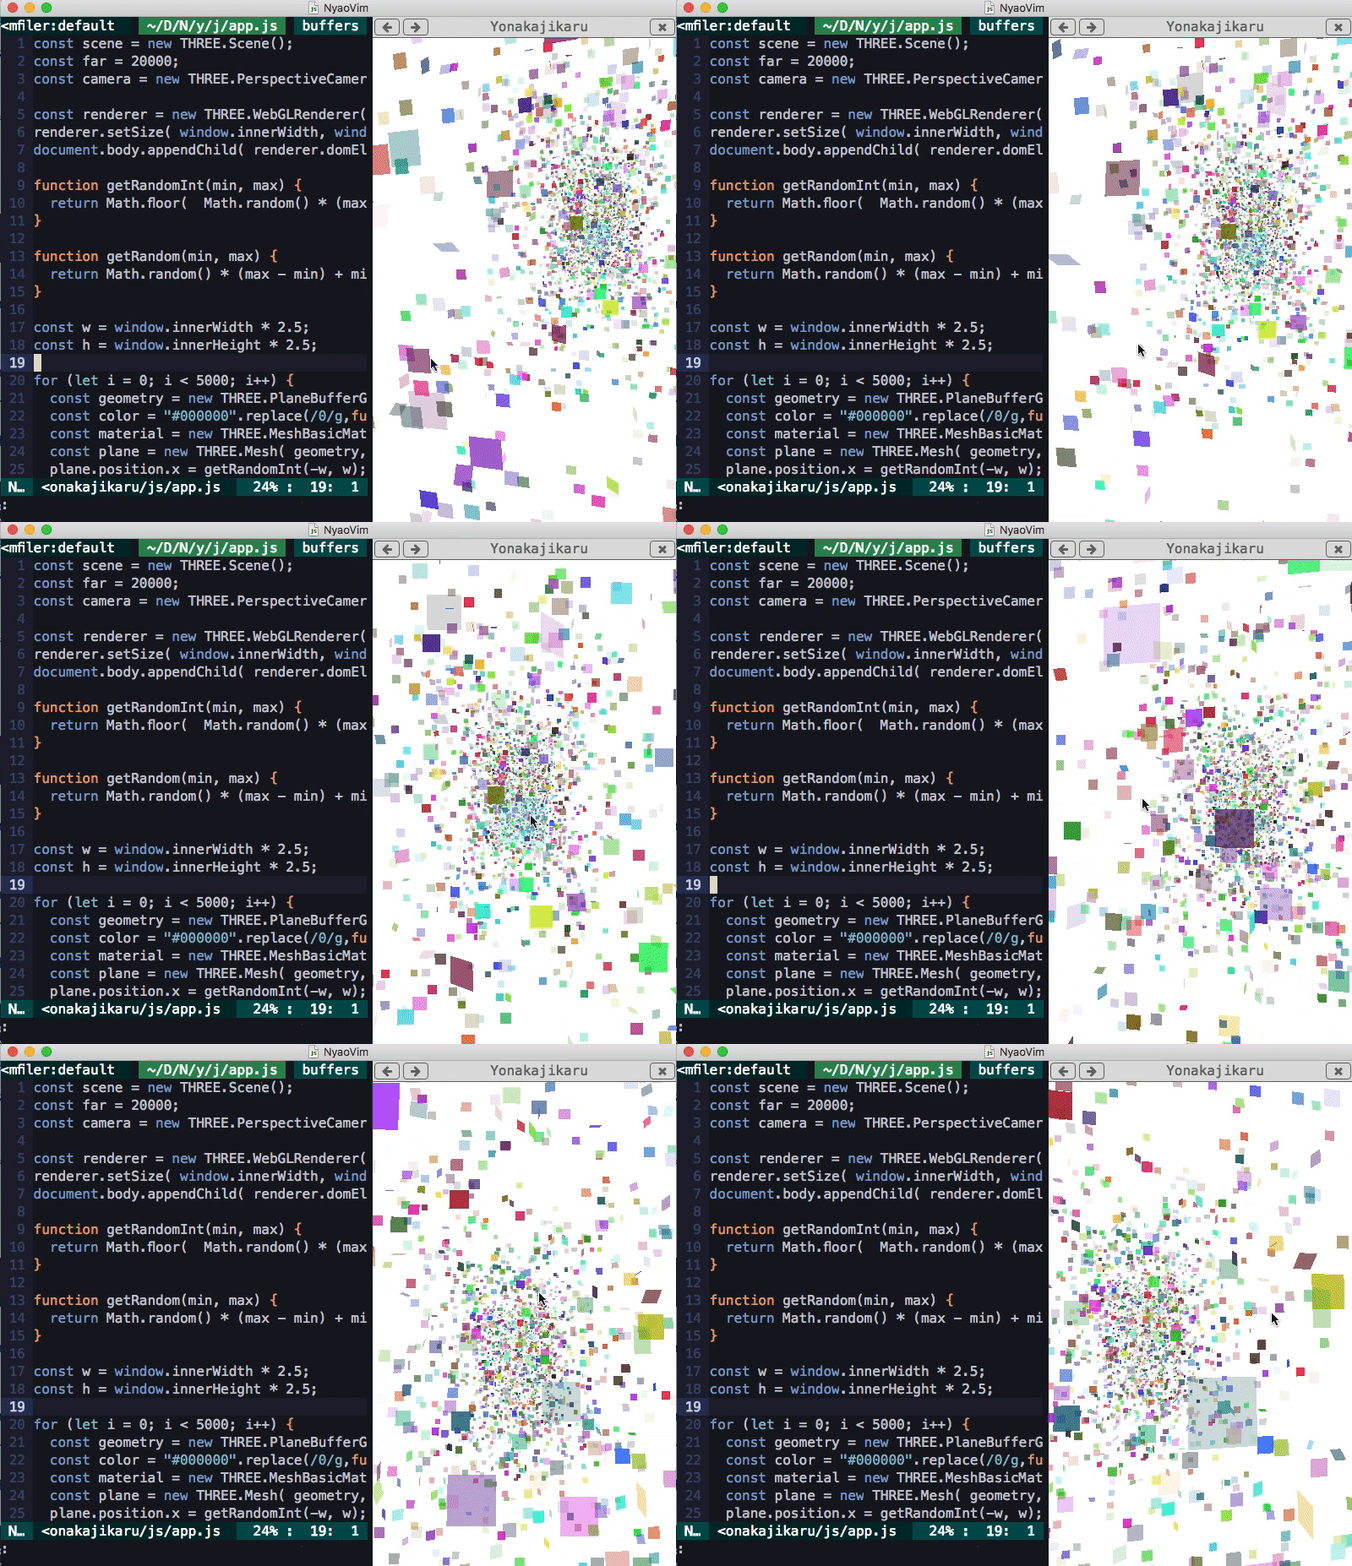
11月あたりからvim環境を見直して概ねまとまってきたのでメモとして残しておきます。
概要は
- Neovim導入
- プラグイン整理(neobundle => dein.vim)
- Neovim/Vim/Nyaovim対応
になります。
設定ファイルはGitHubの.dotfilesにあるのでこちらを見ればこの記事は読まなくてもいいかもしれません。
Neovimはじめました
Neovimのterminal modeに感動してNeovimをはじめてみることにしました。
あとVimよりサクサク動いていて、思考の速度に近づいてる気がします。
Neovimのインストールはパッケージマネージャーから
OSXとUbuntuでの開発が多いのでパッケージマネージャーを使ってインストールすることにします。
しかもNeovimの場合パッケージマネージャーを使用して新しいNeovimをインストールすることが可能なので手元でビルドしなくていいのもメリットだと感じています。
あとPython拡張を使うのでインストールと一緒に有効にしておきます。
OSXの場合(homebrew-neovim/README.md at master · neovim/homebrew-neovim)
brew tap neovim/neovim
brew install --HEAD neovim
brew install python
brew install python3
pip2 install --user --upgrade neovim
pip3 install --user --upgrade neovim
Ubuntuの場合(Installing Neovim · neovim/neovim Wiki)
sudo apt-get install software-properties-common
sudo add-apt-repository ppa:neovim-ppa/unstable
sudo apt-get update
sudo apt-get install neovim
sudo apt-get install python-dev python-pip python3-dev python3-pip
sudo pip2 install --user --upgrade neovim
sudo pip3 install --user --upgrade neovim
手元でビルドする場合、CentOS6以前などではビルドに必要なツールをビルドする必要があったりするので、自分の場合は環境によってはNeovimは諦めてVimも併用で使うようにしています。
設定ファイルの場所
デフォルトでは"~/.config/nvim/init.vim"がVimで言う"~/.vimrc"になります。
環境変数"$XDG_CONFIG_HOME"を変更することで、デフォルトの"~/.config"部分を変更できます。
今後Neovimメインで使っていくような気がしているので、.vimrcへのシンボリックリンクを作成することでVimも同じ設定で使えるようにしています。
Nyaovimもはじめました

MiniBrowserプラグインを使って、Web開発のプレビューを横に出しながらプログラミングできて楽しいです。
Markdownプレビューも最高です。
設定ファイル(~/.config/nyaovim/nyaovimrc.html)
<dom-module id="nyaovim-app">
  <template>
    <style>
      /* CSS configurations here */
      .horizontal {
         display: flex;
         width: 100%;
         height: 100%;
       }
       neovim-editor {
         width: 100%;
         height: 100%;
       }
    </style>

    <!-- Component tags here -->
    <div class="horizontal">
      <neovim-editor
        id="nyaovim-editor"
        argv="[[argv]]"
        font-size="16"
        font="Meslo LG M DZ for Powerline">
      </neovim-editor>
      <markdown-preview editor="[[editor]]"></markdown-preview>
      <mini-browser url="https://google.com" editor="[[editor]]"></mini-browser>
    </div>
    <popup-tooltip editor="[[editor]]"></popup-tooltip>
  </template>
</dom-module>
Nyaovimプラグインもdein.vimで読み込むのですが、"if exists('g:nyaovim_version')"を使うことでNyaovim固有の設定を記述します。
プラグイン整理
今までの構成を大幅に変更してみました。dein.vimによる影響が大きいですが以下の点が今までと大きく変わりました。
- cacheの利用
- プラグイン遅延ロード
- tomlファイルでプラグイン管理
- NeovimとVimとNyaovimで設定を分ける
- NeovimとVimとNyaovimで使用するプラグインも使い分かる
Neovimをメインに据えていくのでルートディレクトリは"~/.config/nvim"で、ディレクトリ構成は以下のようになっています。
~/.config/nvim
├── dein.toml
├── deinlazy.toml
├── init.vim
├── keymap.rc.vim
├── options.rc.vim
└── plugins
    ├── airline.rc.vim
    ├── anzu.rc.vim
    ├── deoplete.rc.vim
    ├── iceberg.rc.vim
    ├── neocomplete.rc.vim
    ├── neomake.rc.vim
    ├── neoterm.rc.vim
    ├── nerdcomenter.rc.vim
    ├── syntastic.rc.vim
    ├── vimfiler.rc.vim
    ├── vimshell.rc.vim
    └── yankround.rc.vim
dein.vim
Shougo氏がdein.vimという新しいプラグインマネージャを作っていたのでそちらに移行しました。
基本的にShougo氏のvimrcを参考にして作ってみました。
- cacheを使う(dein#load_state) => shougo-s-github/dein.rc.vim#L8
- deinがインストールされていなかったらインストールする => shougo-s-github/init.rc.vim#L70
- tomlを使う => shougo-s-github/dein.rc.vim#L15
このあたりを参考にして以下のようなinit.vimになりました。
if &compatible
  set nocompatible
endif

augroup MyAutoCmd
  autocmd!
augroup END

if exists('g:nyaovim_version')
  let s:dein_cache_path = expand('~/.cache/nyaovim/dein')
elseif has('nvim')
  let s:dein_cache_path = expand('~/.cache/nvim/dein')
else
  let s:dein_cache_path = expand('~/.cache/vim/dein')
endif

let s:dein_dir = s:dein_cache_path
                 \ .'/repos/github.com/Shougo/dein.vim'

if &runtimepath !~ '/dein.vim'
  if !isdirectory(s:dein_dir)
    execute '!git clone https://github.com/Shougo/dein.vim' s:dein_dir
  endif
  execute 'set runtimepath+=' . fnamemodify(s:dein_dir, ':p')
endif

if dein#load_state(s:dein_cache_path)
  call dein#begin(s:dein_cache_path)

  call dein#load_toml('~/.config/nvim/dein.toml', {'lazy' : 0})
  call dein#load_toml('~/.config/nvim/deinlazy.toml', {'lazy' : 1})

  if exists('g:nyaovim_version')
    call dein#add('rhysd/nyaovim-popup-tooltip')
    call dein#add('rhysd/nyaovim-markdown-preview')
    call dein#add('rhysd/nyaovim-mini-browser')
  endif

  call dein#end()
  call dein#save_state()
endif

if dein#check_install()
  call dein#install()
endif

filetype plugin indent on
syntax enable

runtime! options.rc.vim
runtime! keymap.rc.vim
ポイントは、Neovim/Vim/Nyaovimでcacheのパスを使い分けて各々のプラグインを使用できるようにしています。
Vim本体の設定とKeymapは別ファイルとして最後に読み込んでいます。
Neovimも開発中なので、プラグインに関しても日々更新されていくものが多いので、動作がおかしいときや数日に一度は":call dein#update()"してプラグインを更新すると良いです。
管理するプラグインについてはdein.toml(遅延ロードするプラグインはdeinlazy.toml)に書きます。
[[plugins]]
repo = 'xxx/yyy'
基本的には上の書き方で、設定がある場合はhook_*を使って設定を読み込みます。
- hook_addはプラグイン追加後
- hook_sourceはプラグイン読み込み前
- hook_post_sourceはプラグイン読み込み後
(ドキュメント => dein.vim/dein.txt at master · Shougo/dein.vim)
hookのスクリプトに"source
ifというキーを使ってNeovimやVimの切り替えができます。
以下はneocompleteとdeoplete.nvim、neotermとvimshellの例です。
[[plugins]]
repo = 'Shougo/neocomplete.vim'
depends = 'context_filetype.vim'
if = "has('lua')"
on_i = 1
hook_source = '''
source ~/.config/nvim/plugins/neocomplete.rc.vim
'''

[[plugins]]
repo = 'Shougo/deoplete.nvim'
depends = 'context_filetype.vim'
if = "has('nvim')"
on_i = 1
hook_source = '''
source ~/.config/nvim/plugins/deoplete.rc.vim
'''

[[plugins]]
repo = 'kassio/neoterm'
if = "has('nvim')"
hook_add = '''
source ~/.config/nvim/plugins/neoterm.rc.vim
'''

[[plugins]]
repo = 'Shougo/vimshell'
if = "!has('nvim')"
hook_add = '''
source ~/.config/nvim/plugins/vimshell.rc.vim
'''
これを書くまでに参考にして勉強したりした情報集です、ありがとうございました。
- NeoVim、そしてdein.vimへ - Qiita
- NeoBundle から dein.vim に乗り換えたら爆速だった話 - Qiita
- NeoVim と dein.vim を使ってみる! - Qiita
- dein.vimによるプラグイン管理のマイベストプラクティス - Qiita
- dein.vimをインストールする - Qiita
- vimのプラグインマネージャをdeinに変えました - raidenの技術系備忘録
- いい感じに dein.vim を活用したvim confを設計した話 - cocuh's note
Vimの文法はこちら
残りは気になった個別のプラグインについて書いていきます。
iceberg
Iceberg - dark color scheme for Vim
目に優しそうでカッコいいカラースキームです。
visual modeを結構多用するのですが、モニターのブルーライトカットが効きすぎているのか色が分かりづらかったのでオレンジ色に変えてあります。
au MyAutoCmd VimEnter * nested colorscheme iceberg
" Visual mode
au MyAutoCmd VimEnter * highlight Visual ctermbg=216
" backgroung transparency
"au MyAutoCmd VimEnter * highlight Normal ctermbg=none
"au MyAutoCmd VimEnter * highlight NonText ctermbg=none
"au MyAutoCmd VimEnter * highlight TablineSel ctermbg=none
"au MyAutoCmd VimEnter * highlight LineNr ctermbg=none
"au MyAutoCmd VimEnter * highlight CursorLineNr ctermbg=none
カラースキームを使う場合、一行目の記述は必須のようです。
neoterm
neovimのterminal modeが便利すぎてやばいです。
とりあえずいつもどおりにノーマルモードを使用するために以下の設定をします。
if has('nvim')
  tnoremap <silent> <ESC> <C-\><C-n>
endif
もっと便利に使うためにneotermを導入します。
kassio/neoterm: Wrapper of some neovim's :terminal functions.
neotermはneovimのterminalラッパープラグインです。手軽に分割ターミナルとかが使えます。
さらに、ファイルや行、選択範囲をreplに突っ込んでterminalで実行したり、テスト連携があったりと便利機能満載です。
以下のように設定しました。
- Quickrunの代用ぽい設定
- toggleする設定
- vimshellの代用ぽい設定
[[plugins]]
repo = 'kassio/neoterm'
if = "has('nvim')"
hook_add = '''
nnoremap <silent> ,rc :TREPLSendFile<cr>
nnoremap <silent> ,rl :TREPLSendLine<cr>
vnoremap <silent> ,rl :TREPLSendSelection<cr>
nnoremap <silent> vt :Ttoggle<cr>
nnoremap <silent> vs :terminal<cr>
'''
shellを指定している方を多く見ましたが、自分の環境では$SHELLが開いている感じがしたので設定していません。
とは言いましたが、Vimではterminal modeは使えないのでVimShellを使うように設定しています。
[[plugins]]
repo = 'kassio/neoterm'
if = "has('nvim')"
hook_add = '''
source ~/.config/nvim/plugins/neoterm.rc.vim
'''

[[plugins]]
repo = 'Shougo/vimshell'
if = "!has('nvim')"
hook_add = '''
source ~/.config/nvim/plugins/vimshell.rc.vim
'''

[[plugins]]
repo = 'Shougo/vimproc.vim'
if = "!has('nvim')"
build = 'make'
neomake
非同期でmakeやlintを実行するsyntasticの非同期版のようなプラグインです。
READMEは最低限の内容のみとなっているので、helpを読みながら設定していきます。
まず、見た目の設定です。
" color
autocmd! BufWritePost * Neomake
au MyAutoCmd ColorScheme * hi NeomakeErrorSign cterm=bold ctermfg=7 ctermbg=9
au MyAutoCmd ColorScheme * hi NeomakeWarningSign cterm=bold ctermfg=8 ctermbg=216
au MyAutoCmd ColorScheme * hi NeomakeMessageSign cterm=bold ctermfg=8 ctermbg=150
au MyAutoCmd ColorScheme * hi NeomakeInfoSign cterm=bold ctermfg=8 ctermbg=110
" text
let g:neomake_error_sign = {'text': 'E✖', 'texthl': 'NeomakeErrorSign'}
let g:neomake_warning_sign = {
    \   'text': 'W➤',
    \   'texthl': 'NeomakeWarningSign',
    \ }
let g:neomake_message_sign = {
     \   'text': 'M➤',
     \   'texthl': 'NeomakeMessageSign',
     \ }
let g:neomake_info_sign = {'text': 'ℹ➤', 'texthl': 'NeomakeInfoSign'}
基本的にここにあるmakerは使えます。有効にする際は以下のように書きます。
let g:neomake_<lang>_enabled_makers = ['<maker>', '<maker>']
maker名は末尾の名前です、例えばneomake/cpp.vim at master · neomake/neomakeにある"function! neomake#makers#ft#cpp#gcc()"の場合は"gcc"になります。
複数指定すると複数個makerが動くことになるので動作が被ってる場合、同じメッセージが複数出ます。
makerは自作することもできるようです。
g:neomake_{ filetype }_{ makername }_maker
ディレクトリmakerという機能もあるようなので気になります。
Vim7.4.503からneomakeは使用可能ですが、syntasticに慣れていたのもありVimを使う時はsyntasticを使うようにしています。
[[plugins]]
repo = 'neomake/neomake'
if = "has('nvim')"
hook_add = '''
source ~/.config/nvim/plugins/neomake.rc.vim
'''

[[plugins]]
repo = 'vim-syntastic/syntastic'
if = "!has('nvim')"
hook_add = '''
source ~/.config/nvim/plugins/syntastic.rc.vim
'''
ちなみにSyntasticもneomakeと同じような見た目になるように設定しています。
" ColorScheme
au MyAutoCmd VimEnter * highlight SignColumn ctermbg=237
au MyAutoCmd VimEnter * highlight SyntasticErrorSign cterm=bold ctermfg=255 ctermbg=203
au MyAutoCmd VimEnter * highlight SyntasticWarningSign cterm=bold ctermfg=233 ctermbg=150
let g:syntastic_error_symbol = 'E➤'
let g:syntastic_warning_symbol = 'W➤'
" Basic setting
let g:syntastic_always_populate_loc_list = 1
"let g:syntastic_auto_loc_list = 1
let g:syntastic_check_on_open = 1
let g:syntastic_check_on_wq = 0
" for javascript
let g:syntastic_javascript_checkers = ['eslint']
" for c/cpp
let g:syntastic_cpp_compiler_options = '-Wall'
deoplete.nvim
neocompleteに次ぐ補完プラグインです。
deinlazyに追加します。
[[plugins]]
repo = 'Shougo/deoplete.nvim'
depends = 'context_filetype.vim'
if = "has('nvim')"
on_i = 1
hook_source = '''
source ~/.config/nvim/plugins/deoplete.rc.vim
'''
deoplete.rc.vim
let g:deoplete#enable_at_startup = 1
" <TAB>: completion.
inoremap <silent><expr> <TAB>
      \ pumvisible() ? "\<C-n>" :
      \ <SID>check_back_space() ? "\<TAB>" :
      \ deoplete#manual_complete()
function! s:check_back_space() abort "{{{
  let col = col('.') - 1
  return !col || getline('.')[col - 1]  =~ '\s'
endfunction"}}}

" <S-TAB>: completion back.
inoremap <expr><S-TAB>  pumvisible() ? "\<C-p>" : "\<C-h>"

" <BS>: close popup and delete backword char.
inoremap <expr><BS> deoplete#smart_close_popup()."\<C-h>"

" Use auto delimiter
call deoplete#custom#set('_', 'converters', [
      \ 'converter_remove_paren',
      \ 'converter_remove_overlap',
      \ 'converter_truncate_abbr',
      \ 'converter_truncate_menu',
      \ 'converter_auto_delimiter',
\ ])

let g:deoplete#enable_camel_case = 1
deoplete.nvim/deoplete.txt at master · Shougo/deoplete.nvim
ドキュメントを見ると言語ごとにEXTERNAL SOURCESがあるので、開発する言語を中心にプラグインを適宜追加していけば良さそうです。
vim-airline
airlineは対応しているプラグインも多く設定も少なくて済むので、とても好きなpowerlineです。
dein.vimは依存関係を書けるので設定ファイルがわかりやすくなって良いです。
[[plugins]]
repo = 'majutsushi/tagbar'

[[plugins]]
repo = 'tpope/vim-fugitive'

[[plugins]]
repo = 'vim-airline/vim-airline'
depends = ['tagbar', 'vim-fugitive']
hook_add = '''
source ~/.config/nvim/plugins/airline.rc.vim
'''

[[plugins]]
repo = 'vim-airline/vim-airline-themes'
depends = 'vim-airline'
hook_add = '''
let g:airline_theme='luna'
'''
airline.rc.vim
if exists('g:nyaovim_version')
  let g:airline_powerline_fonts = 0
  let g:airline_left_sep = ''
  let g:airline_right_sep = ''
else
  let g:airline_powerline_fonts = 1
endif
let g:airline#extensions#tabline#enabled = 1
if !has('nvim')
  let g:airline#extensions#whitespace#mixed_indent_algo = 2 " see :help airline-whitespace@en
endif
NyaovimでPowerlineFontが崩れてしまったのでNyaovimでは無効にしています。
mixed_indentがうざかったりしますがドキュメントを読むとアルゴリズムを変更できるので賢めのアルゴリズムに変更しています。
Vimfiler
Shougo/vimfiler.vim: Powerful file explorer implemented by Vim script
便利すぎて手放せないプラグインです。
[[plugins]]
repo = 'Shougo/unite.vim'
hook_add = '''
nnoremap <silent> fb :<C-u>Unite buffer<CR>
'''

[[plugins]]
repo = 'Shougo/vimfiler.vim'
depends = 'unite.vim'
hook_add = '''
source ~/.config/nvim/plugins/vimfiler.rc.vim
'''
vimfiler.rc.vim
call vimfiler#custom#profile('default', 'context', {
     \ 'safe' : 0,
     \ 'auto_expand' : 1,
     \ 'parent' : 0,
     \ })
"default explore -> vimfiler
let g:vimfiler_as_default_explorer = 1
"buffer directory
nnoremap <silent> fe :<C-u>VimFilerBufferDir -quit<CR>
" Nerdtree like
nnoremap <C-e> :<C-u>VimFilerBufferDir -split -winwidth=120 -toggle -no-quit<CR>
"key mapping
autocmd MyAutoCmd FileType vimfiler call s:vimfiler_my_settings()
function! s:vimfiler_my_settings()
  nnoremap <silent><buffer><expr> s vimfiler#do_switch_action('vsplit')
  nnoremap <silent><buffer><expr> v vimfiler#do_switch_action('split')
  nnoremap <silent><buffer><expr> t vimfiler#do_action('tabopen')
endfunction
" Textmate icons
let g:vimfiler_tree_leaf_icon = ' '
let g:vimfiler_tree_opened_icon = '▾'
let g:vimfiler_tree_closed_icon = '▸'
let g:vimfiler_file_icon = '-'
let g:vimfiler_marked_file_icon = '*'
関数内検索
1000行くらいの長い関数がひしめき合ってるコードと向かい合うとき関数内検索があるとかなり便利なので下記の情報を元にできるようにしました。かなり便利です。
[[plugins]]
repo = 'kana/vim-operator-user'

[[plugins]]
repo = 'kana/vim-textobj-user'

[[plugins]]
repo = 'kana/vim-textobj-function'

[[plugins]]
repo = 'osyo-manga/vim-operator-search'
depends = ['vim-operator-user', 'vim-textobj-function', 'vim-textobj-user']
hook_add = '''
nmap <Space>/ <Plug>(operator-search)if
'''


Show comments