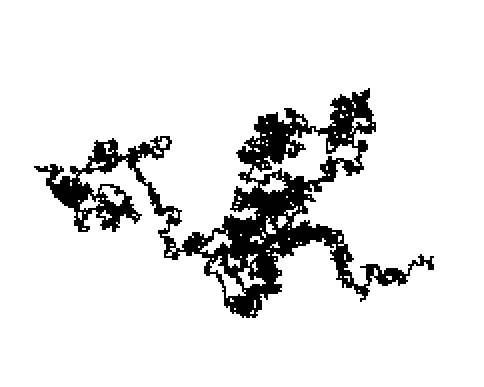
WebAssembly(以下WASM)には興味があって遊んでみたいと思っていたら、rustifyという便利な魔法が先日GitHubに現れたので使ってみました。
続編のほうが詳しいです => rustifyでWebAssembly - ライフゲームを作る
ElectronでWASMを使ってランダムウォークをしてみます。
準備
Node.js環境をnvmで、Rust環境をrustupで準備します。
% nvm install --lts
% rustup update
rustifyを使うための準備です。
% rustup target add wasm32-unknown-unknown --toolchain nightly
% cargo install --git https://github.com/alexcrichton/wasm-gc
Rustのブロジェクトを作ります。
% cargo init random_walk
Node.jsのプロジェクトも作ります。
% cd random_walk
% mkdir view
% npm init
Browserifyとrustify、Electronのインストールします。
% npm install browserify rustify electron
サンプル動作
まずElectronの準備をします。
https://github.com/electron/electron/blob/master/docs/tutorial/quick-start.md
ここを参考にindex.htmlとmain.jsを作ります。
index.htmlはcanvasタグとscriptタグでbuild.jsを読み込むように変更します。
<!DOCTYPE html>
<html>
  <head>
    <meta charset="UTF-8">
    <title>Random Walk</title>
  </head>
  <body>
    <canvas id="canvas"></canvas>
    <script src="build.js"></script>.
  </body>
</html>
次にrustifyするrender.jsを作ります。
https://github.com/browserify/rustify
サンプルコードのExternalで作ります。
var rust = require('rustify')

var wasm = rust('add-one.rs')

WebAssembly.instantiate(wasm, {})
  .then(function (res) {
    var addOne = res.instance.exports.add_one
    console.log(addOne(41))
    console.log(addOne(68))
  }).catch(function (e) {
    console.error('Creating WASM module failed', e)
  })
viewフォルダにadd-one.rsを作ります。
#[no_mangle]
pub fn add_one(x: i32) -> i32 {
    x + 1
}
browserifyでWASM入りのbuild.jsに変換します。
% cd view
% ./node_modules/.bin/browserify -t rustify render.js > build.js
% ./node_modules/.bin/electron .
DevToolsに42と69が表示されていれば成功。
ランダムウォークを作る
必要なのは乱数だけです。
Rustの乱数はrandクレートですが、extern crateするとrustifyでエラーが出てしまったので実装します。
手軽なのはXorShiftなので検索してスッと実装します。
use std::u32;

pub struct XorShift {
    x: u32,
    y: u32,
    z: u32,
    w: u32,
}

impl XorShift {
    pub fn new() -> XorShift {
        return XorShift {
            x: 123456789,
            y: 362436069,
            z: 521288629,
            w: 88675123,
        };
    }

    pub fn gen(&mut self) -> u32 {
        let _x = self.x;
        let t = _x ^ (_x << 11);
        self.x = self.y;
        self.y = self.z;
        self.z = self.w;
        let _w = self.w;
        self.w = (_w ^ (_w >> 19)) ^ (t ^ (t >> 8));
        self.w
    }

    pub fn gen_norm(&mut self) -> f64 {
        self.gen() as f64 / u32::MAX as f64
    }
}
面倒なのでseedは固定です。0~1に正規化された乱数のほうが判定しやすいのでgen_norm関数を用意しました。
wasmからstructを読み込む方法がわからなかったのでstatic mutのXorShiftを用意してそれから乱数を取り出す関数を作りました。先程のファイルの末尾に以下を追加します。
static mut xorshift: XorShift = XorShift {
    x: 123456789,
    y: 362436069,
    z: 521288629,
    w: 88675123,
};

#[no_mangle]
pub fn rand() -> f64 {
    unsafe { xorshift.gen_norm() }
}
あとはこの乱数を使ってCanvas上にぽちぽちプロットしていけば完成です。
let rust = require('rustify')

let wasm = rust('../src/xorshift.rs')

WebAssembly.instantiate(wasm, {})
  .then(function (res) {
    let rand = res.instance.exports.rand
    let canvas = document.getElementById("canvas")
    canvas.width = window.innerWidth
    canvas.height = window.innerHeight
    let ctx = canvas.getContext("2d")
    // start from center
    let x = ~~canvas.width / 2
    let y = ~~canvas.height / 2
    // unit of step
    const us = 2;
    function render() {
      const r = rand()
      if (r < 0.25) x += us
      else if (r < 0.5) x -= us
      else if (r < 0.75) y += us
      else y -= us
      ctx.fillRect(x, y, us, us)
    }
    setInterval(render, 5)
  }).catch(function (e) {
    console.error('Creating WASM module failed', e)
  })
これをrandom_walk.jsというファイル名で保存して以下のコマンドを実行します。
% cd view
% ./node_modules/.bin/browserify -t rustify random_walk.js > build.js
% ./node_modules/.bin/electron .

ぽちぽち動いていれば完成。
rustify、らくらくwasm体験できるのでもう少し遊んでみたさが高まりました。


Show comments